We recently got to try out the new toy sets from Jungle Junction.
Here's how we got on...
The Jungle Junction Taxicrab Boat Playset is available from all good toy shops.
Check out also our vlog review for the Jungle Junction Race Launcher.
Disclosure: We were sent the toy set for the purposes of this review. All opinions are our own.

Tuesday, 2 October 2012

Monday, 1 October 2012
Magpie Monday - Light Fantastic
What an icky day. I think the car boot sales are pretty much finished now until next year, although every cloud and all that...it's Jumblie season!! I went to one on Saturday. A proper one, that smelt of wee and everything.
All the clothes I bought for re-purposing are currently in quarantine soaking in Ace, so those will have to wait for another show-and-tell day.
Instead I'll show you something I picked up at a boot sale a few weeks back.
This little vintage paper parasol was £3 and made me do a little yelp when I spotted it.
I knew it would be perfect to suspend from Ruby's very un-aesthetically pleasing spotlights in her room.

It prettifies her ceiling and softens the harsh light. I'm very happy with this find.
What have you been thrifting lately?
Grab the badge and link up.

All the clothes I bought for re-purposing are currently in quarantine soaking in Ace, so those will have to wait for another show-and-tell day.
Instead I'll show you something I picked up at a boot sale a few weeks back.
This little vintage paper parasol was £3 and made me do a little yelp when I spotted it.
I knew it would be perfect to suspend from Ruby's very un-aesthetically pleasing spotlights in her room.

It prettifies her ceiling and softens the harsh light. I'm very happy with this find.
What have you been thrifting lately?
Grab the badge and link up.
Thursday, 27 September 2012
Papier-mâché Pumpkin Piñata
...which, as it turns out, is something of a tongue-twister. Go on, say it. Faster. Faster. Did it trip your tongue up?
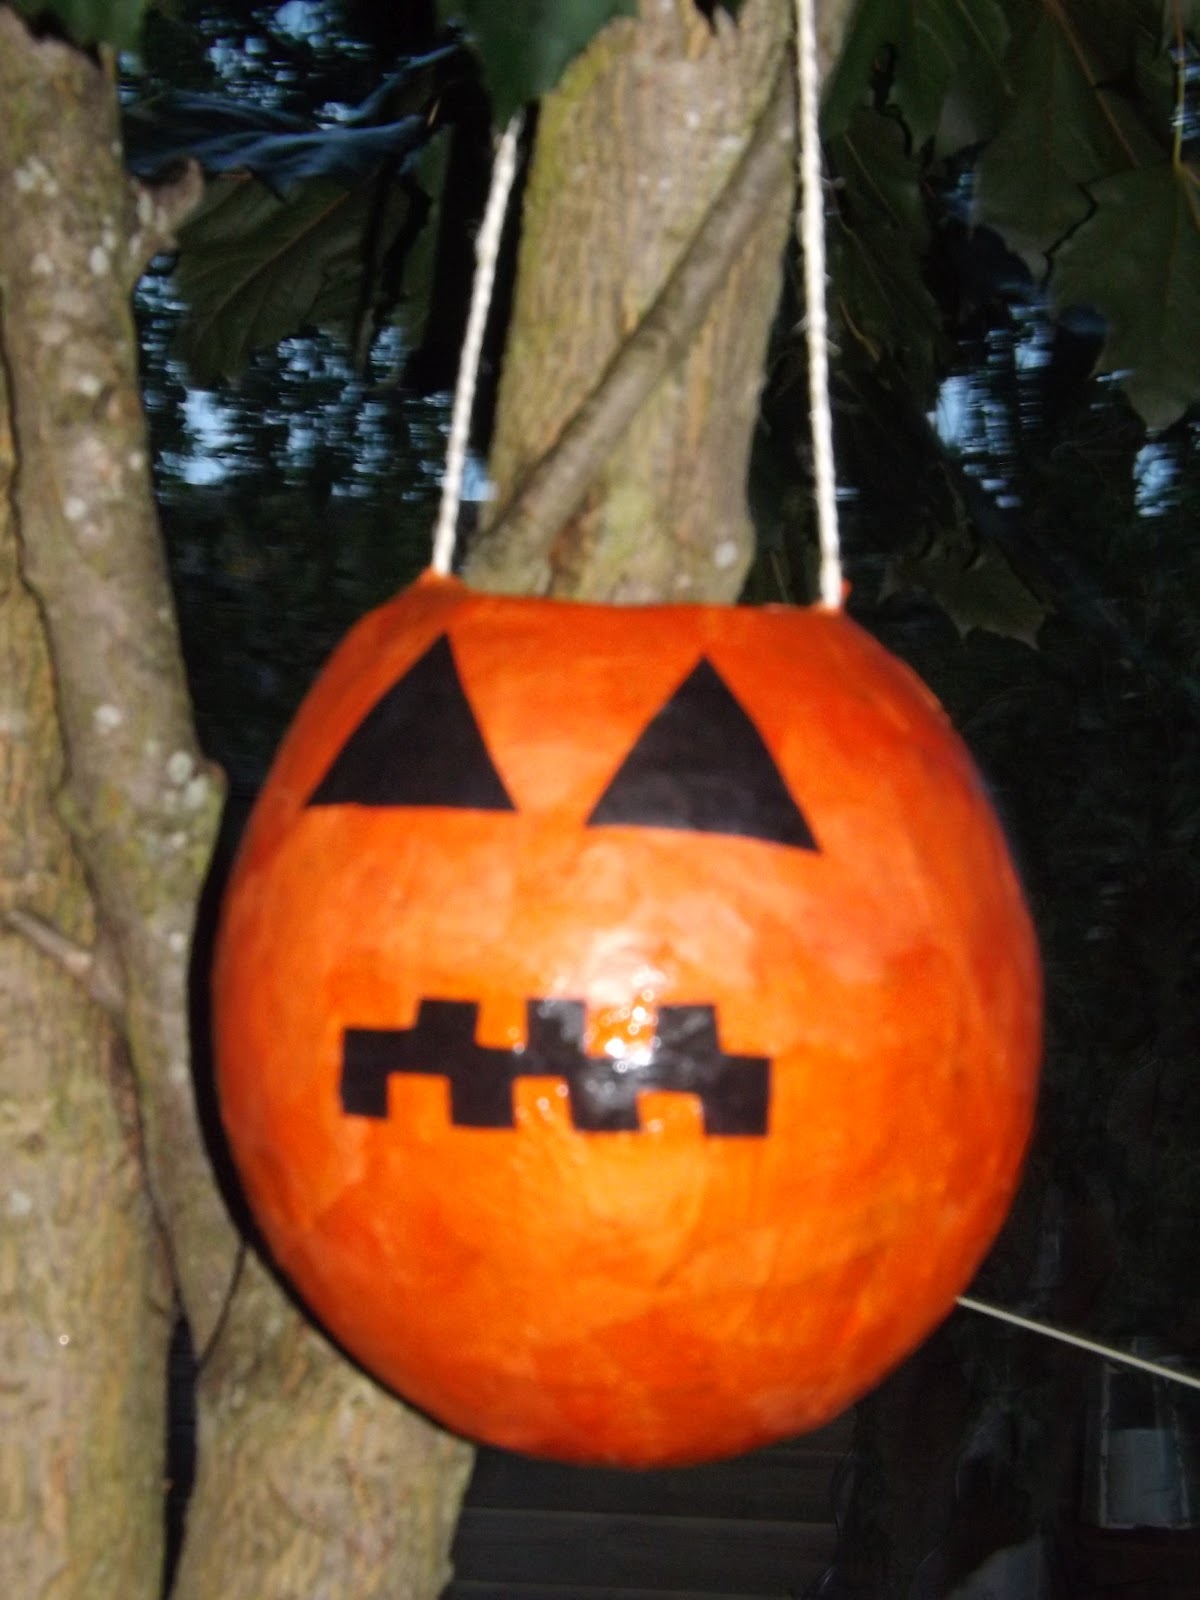
As all things Spanish seem to be seeping into our culture (I totally blame Dora the Explorer for this), I thought it would be fun to make one for Halloween.
The old-school method of papier-mâché -ing over a balloon lends itself to the round shape of a pumpkin, so it seemed the obvious choice. You could try other spooky things though - maybe a spider with eight pipe cleaner legs, or a white ghost...
You will need:
A balloon
Newspaper
Orange tissue paper
Black tissue paper
PVA glue
Paintbrush
String
Begin by blowing up your balloon. Sit it in a suitable sized bowl.
Tear up lots of strips of newspaper - this appeals to Ruby's destructive nature...

Make up a gloop one part water to one part PVA glue, and cover your balloon with newspaper. Use a combination of glueing under and over the strips, ensuring they are smoothed out by using a paintbrush to apply the glue.
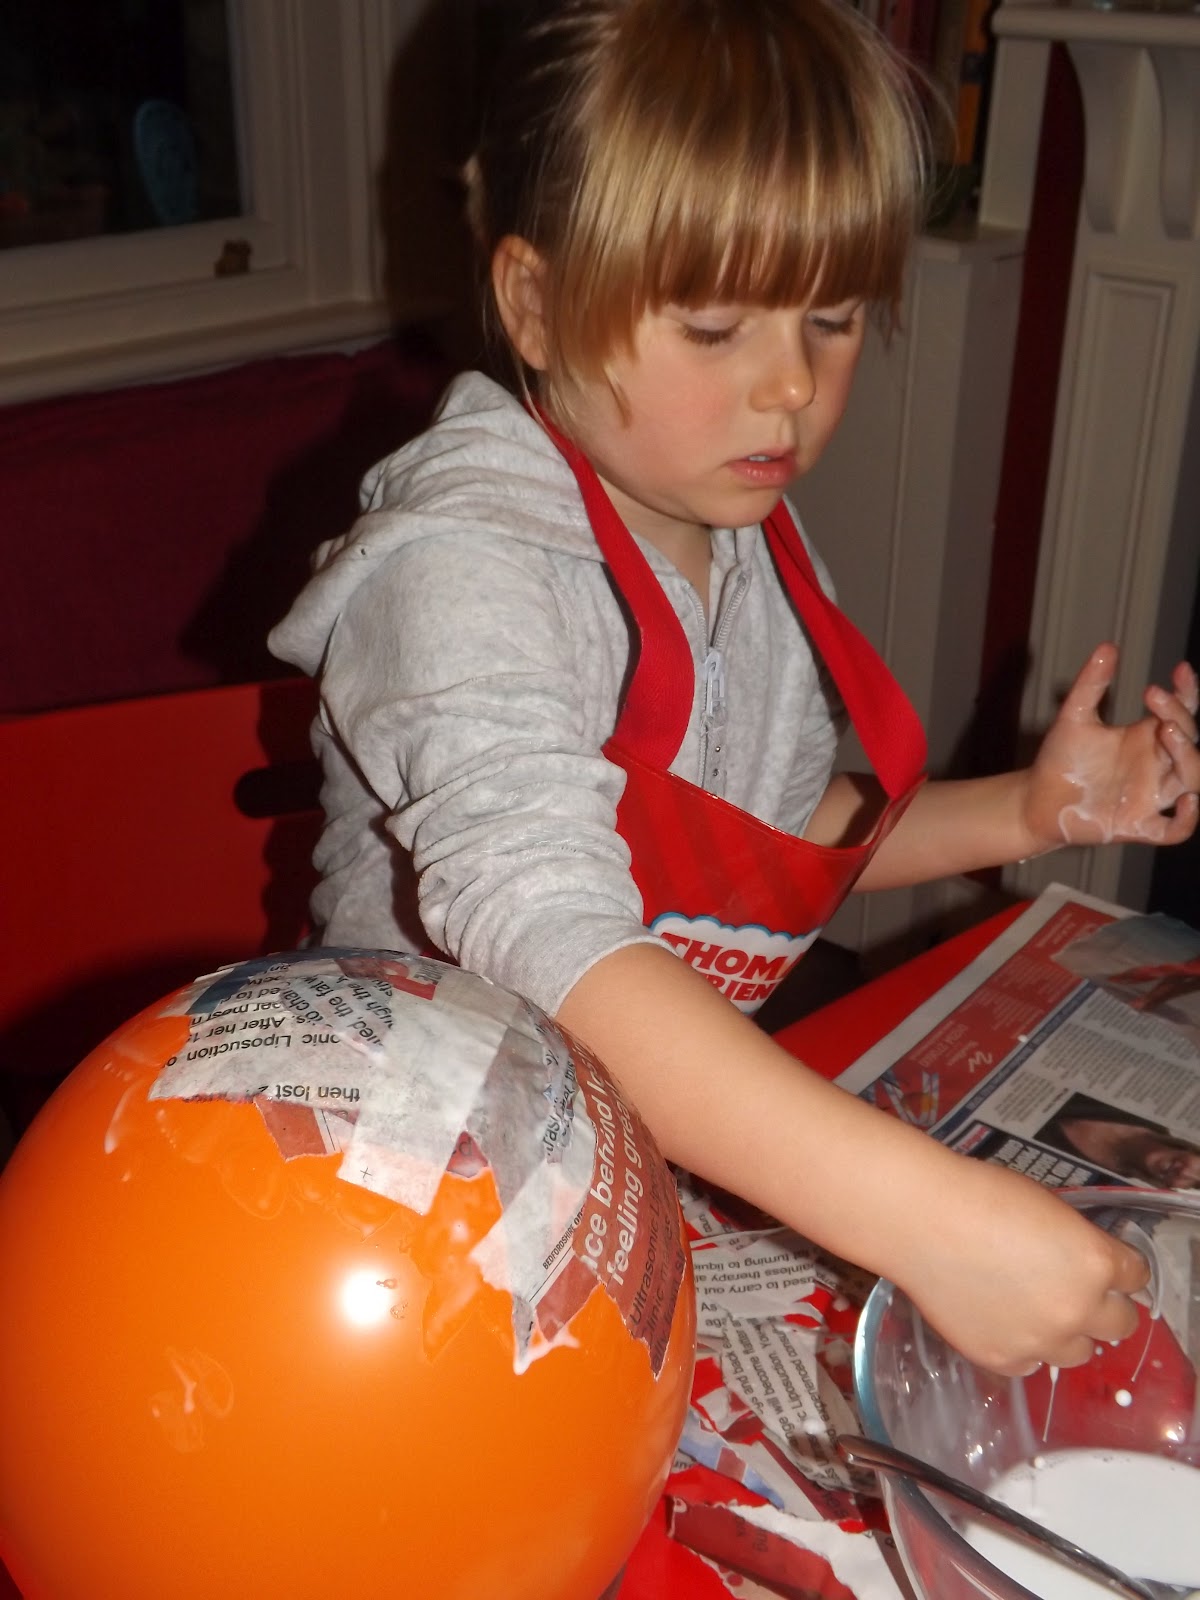
You may need to do this in two goes, allowing the first half to dry before turning it over. Continue nearly to the top of the balloon, but make sure you leave enough gap to fill with sweets.
Once the newspaper is dry, repeat with orange tissue paper. Make sure you overlap well to give it strength.
Leave to dry overnight.

Then pop the balloon, and pull out all the rubbery remnants.

Fill with sweets, then securely tape some string inside to give you a hanging loop.

Cover the gap as before, using newspaper then tissue paper.

Finally, cut out the face details from black tissue paper and glue on.

It's ready to smash the merry hell out of!

 Check out the Halloween Blog Hop and add your posts.
Also linking up with the Perfectly Pumpkin challenge.
Sunday, 23 September 2012
Magpie Monday - Honey, I shrunk the sewing machine
Yesterday was a super-quick scoot round the boot sale before the heavens opened.
It felt like a proper winter day and there were lots of forlorn and downright depressed faces as everyone trudged round the field.
Hardly any sellers had turned up, yet the car park was full of buyers. I kinda knew there weren't going to be many bargains to be had.
However, as the first spots of rain fell, the sellers began quickly packing up, desperate to get home to a hot cup of cocoa. I spied this fabulous vintage mini sewing machine on a table, and the fella who'd clearly had enough only wanted £4 for it.

I don't know if it works - the mechanism seems to work ok (although the cogs that turn the hand wheel do slip a bit). I haven't threaded it up as I don't really know what goes where, or even if all the parts are present.
There's no maker's mark on it anywhere, but I'd love to find out more about it. For now, it sits happily onto of my Singer sewing machine treadle table. Even if it doesn't work, it looks cute don't cha think?!
What second-hand lovelies have you found recently? Grab the badge and link up x
UPDATE: Ooooooh I've found this on eBay. £70!! Get in. OK, so I don't have the box, and it looks like there may be a knob missing, but I'm happy to know the manufacturer and age :0)
Hardly any sellers had turned up, yet the car park was full of buyers. I kinda knew there weren't going to be many bargains to be had.
However, as the first spots of rain fell, the sellers began quickly packing up, desperate to get home to a hot cup of cocoa. I spied this fabulous vintage mini sewing machine on a table, and the fella who'd clearly had enough only wanted £4 for it.

I don't know if it works - the mechanism seems to work ok (although the cogs that turn the hand wheel do slip a bit). I haven't threaded it up as I don't really know what goes where, or even if all the parts are present.
There's no maker's mark on it anywhere, but I'd love to find out more about it. For now, it sits happily onto of my Singer sewing machine treadle table. Even if it doesn't work, it looks cute don't cha think?!
What second-hand lovelies have you found recently? Grab the badge and link up x
UPDATE: Ooooooh I've found this on eBay. £70!! Get in. OK, so I don't have the box, and it looks like there may be a knob missing, but I'm happy to know the manufacturer and age :0)
Friday, 21 September 2012
Pillowcase Upcycle - Junk Modelling Sack
I thought it was about time I set another upcycling challenge.
We've done jeans and we've done jumpers. This time it's all about pillow cases...
What ingenious new uses can you find for them?
I've taken one of the many pillowcases I pick up second-hand, and made a solution to a major problem in our house.
Yes, it's great that Ruby loves to craft, but it seems I've created a monster. She's forever in the recycling bin pulling things out, refusing to let me throw them away because she could make something from it, or do junk modelling with it. And so, we are forever stepping over random cereal boxes, loo roll tubes and shampoo bottles that are stuck in a kind of refuse limbo...

So, the junk modelling sack was born.
You will need:
1 old pillowcase
Wide ribbon 2 x the width of the pillowcase
Cord 2.5 x the width of the pillowcase
Bondaweb
Fabric scraps
Sewing machine or needle and thread
Begin by pinning your ribbon near the top edge of your case (open end). Start by folding the end and tucking it under for a neat edge.

Continue in one length around both the front and the back, again tucking the end under.

Straight stitch along both top and bottom edge of the ribbon to create a channel with two open ends.

Thread your cord through. Pin one end to a safety pin if it helps to feed it through. Tie the ends together to make your drawstring.
Then design your motif and lettering. It's nice to do a simple image of something you'd make while junk modelling, like a castle, a rocket or a robot. Draw your images onto the bondaweb (smooth side) and remember if you're adding letters or numbers you'll need to reverse them. It would be nice to make personalised ones with names on.

Roughly cut out the images from the bondaweb and place rough side down onto the wrong side of your fabric. Hold a hot iron on for 10-20 seconds. When cool, cut neatly round your outline.

Play about with the positioning until you're happy, then peel off the paper layer and iron down to secure.

Brilliant! It saves mess around the kitchen, Ruby takes ownership of what she wants to keep to craft with, and when it's full, we know it's time to make a model!
I think if you added some crafting materials like glue, scissors, pipe cleaners and googly eyes, these would make a great gift for a crafty child.
Now for your challenge...
I'd like you to link up a blog post featuring something you've made with a pillowcase, or a pillowcase you've decorated or improved some how. You can add as many posts as you like, but please link back here so others can find out about the challenge.
Closing date is Sunday 14th October at 5pm. After that time I'll pick one entry at random to win the queen of craft's book - Kirstie Allsopp Craft. This hardback book retails at £20 and is crammed with crafty goodness.

UK entries only I'm afraid as I'm covering postage.
We've done jeans and we've done jumpers. This time it's all about pillow cases...
What ingenious new uses can you find for them?
I've taken one of the many pillowcases I pick up second-hand, and made a solution to a major problem in our house.
Yes, it's great that Ruby loves to craft, but it seems I've created a monster. She's forever in the recycling bin pulling things out, refusing to let me throw them away because she could make something from it, or do junk modelling with it. And so, we are forever stepping over random cereal boxes, loo roll tubes and shampoo bottles that are stuck in a kind of refuse limbo...

So, the junk modelling sack was born.
You will need:
1 old pillowcase
Wide ribbon 2 x the width of the pillowcase
Cord 2.5 x the width of the pillowcase
Bondaweb
Fabric scraps
Sewing machine or needle and thread
Begin by pinning your ribbon near the top edge of your case (open end). Start by folding the end and tucking it under for a neat edge.

Continue in one length around both the front and the back, again tucking the end under.

Straight stitch along both top and bottom edge of the ribbon to create a channel with two open ends.

Thread your cord through. Pin one end to a safety pin if it helps to feed it through. Tie the ends together to make your drawstring.
Then design your motif and lettering. It's nice to do a simple image of something you'd make while junk modelling, like a castle, a rocket or a robot. Draw your images onto the bondaweb (smooth side) and remember if you're adding letters or numbers you'll need to reverse them. It would be nice to make personalised ones with names on.

Roughly cut out the images from the bondaweb and place rough side down onto the wrong side of your fabric. Hold a hot iron on for 10-20 seconds. When cool, cut neatly round your outline.

Play about with the positioning until you're happy, then peel off the paper layer and iron down to secure.

Brilliant! It saves mess around the kitchen, Ruby takes ownership of what she wants to keep to craft with, and when it's full, we know it's time to make a model!
I think if you added some crafting materials like glue, scissors, pipe cleaners and googly eyes, these would make a great gift for a crafty child.
Now for your challenge...
I'd like you to link up a blog post featuring something you've made with a pillowcase, or a pillowcase you've decorated or improved some how. You can add as many posts as you like, but please link back here so others can find out about the challenge.
Closing date is Sunday 14th October at 5pm. After that time I'll pick one entry at random to win the queen of craft's book - Kirstie Allsopp Craft. This hardback book retails at £20 and is crammed with crafty goodness.

UK entries only I'm afraid as I'm covering postage.
Tuesday, 18 September 2012
Kids Get Arty - Exploring Banksy

Hooray, it's time again for my favourite blog link - up 'Kids Get Arty' with Red Ted Art. You may remember last time we learnt about William Morris. Well, we thought we'd bring it bang up to date and look at one of our best loved current artists, the street artist known as Banksy.
Ruby has a very strong - and cute - sense of right and wrong. Even from the time I was pushing her in her buggy, if she saw graffiti on the walls she'd tut tut and shake her head. 'Naughty!' she'd exclaim.
It is of course an old debate - can some graffiti be 'art'? Well, I believe it can. I don't mean the mindless tagging or phallic images, but the intricate, thought-provoking; skillful and often political spray paintings are truly (to me) works of great art.
Of course, by it's very nature, much of this art will be temporary. Covered over by advertising, re-building work, council officials or rival street artists. But this is what I love about it, the fact that you have to keep your eyes out for something new all the time.
Myself and Maggy took our girls to London for the day on a Banksy Hunt. Armed with an app on the phone, we sought out as many Banksy pieces as we could.
Of course, his work now commands high prices, and they are often seen as a tourist attraction and boost to the local economy, so nowadays most are protected.
One of his earliest works in London is still just about visible. The faded Gas Mask Girl mask is located on Brick Lane and it was a great way demonstrate to the girls the transience of the work.

Ruby loved looking out for street art as we mooched around east London. There were so many locations that we need to plan a return visit. Here are some that we spotted.

Prison Guard Poodle (2003) located at Cargo Nightclub garden, Rivington Street, EC2A
 |
HMV Dog - same location

Skeleton Car (2004) - Truman Brewery, Brick Lane, E1. The skeleton image on the window has long since gone, but the car remains, protected by a perspex box.


Child Labour (2012) - Whymark Avenue, N22. This was our favourite of the day. It's one of the newer pieces that's appeared over the summer of jubilee and Olympic celebrations. We were lucky enough to speak to the owner of the building who explained that he'd seen someone return to the image the day after it first appeared and attach the bunting. He presumes it was Banksy himself. I think the girls identified with the young child - almost lifelike size to them and they could get right up close to see the detail.
We has such a great day exploring London and uncovering it's street art treasures. Even with the aid of the app some of them took considerable hunting, but that only made it feel even more worthwhile when we found them.
On the way home we talked about how Banksy had created the images. Why there was so much secrecy about him. Does he only paint at night? How come nobody knows who he is?
We talked about how we might recreate a piece when we got home, and where we'd put it...
A week or so later, a very exciting parcel arrived. I'd ordered a stencil and some non-toxic spray paint so Ruby could have a go herself.
I TOTALLY reckon Banksy wears a Thomas the Tank apron when he works. And I TOTALLY think he should try some pink paint.

Despite my good intentions, the non-toxic paint as pretty useless on a vertical surface, so I moved Ruby inside and brought out the big guns.
 |
| I don't know who's worse - me for hoarding it or the old man for organising it. I go out and move them around sometimes, just to mess with his head... |
To be honest, it really needs another coat, but she was too impatient and wanted to take the stencil off to look straight away.

As the ivy grows and covers the wall, the balloon girl will gradually disappear from sight. I think Banksy would approve.

Monday, 17 September 2012
Total Greek Yoghurt - Tia Maria Chocolate Fridge Cake
Did you know there are 1,000 different recipes on the Total Greek Yoghurt website? That's 1,000 ways to enjoy this 100% natural, authentic Greek taste.
Not only that, but they've launched a great new Facebook app so you don't even need to leave your social media page to get your recipe inspiration.
I chose and tested one of their recipes as part of their celebratory competition (click on the badge at the bottom of the page to find out more about the competition). The one I picked was this mouth-watering Chocolate Tia Maria Fridge Cake. Even I can't mess up a no-bake cake right?

To be perfectly honest, I'd have been happy as Larry to have just sat there with a big spoon, ladling the molten chocolate gloop into my mouth - it smelt fabulous!
But, in the spirit of testing out the recipe, I followed it through and popped it into the fridge.
The recipe was simple and straight-forward to follow. I was expecting something akin to a solid Rocky Road type cake, but the addition of cream and Total yoghurt gave it more of a mousse consistency, with big chuncky bites of biscuit and fruit and nut.

I have to say, this was quite an expensive dessert (the addition of alcohol in particular bumping the price up), so probably one saved for a special occasion. If I make it again, I wouldn't use a bag of mixed fruit and nuts, but mix my own. The packet had far too many nasty plain peanuts in - the sort that should only be used in a net and hung out for the birds. With good quality brazil, hazelnuts and maybe macadamia nuts, the recipe would be much improved.
I was a little confused at the image which showed a square piece of fridge cake, and the instructions said to use a round cake tin, so I made mine in a tray.
Finally, the recipe suggests it serves 10. Even for a full-on chocolate lover like me, it was incredibly rich. I reckon you could cut much smaller servings and maybe serve 20 portions from this amount of ingredients.
I took mine along to a party, and whilst it was indeed delicious, I was really nervous - this bad boy contains pretty much every allergen you can imagine, so not great for serving to strangers. I felt like I was fending the small children and pregnant ladies away from the alcohol, and hovering over it to make sure it wasn't being consumed by anyone with a nut/dairy/gluten allergy!

Disclosure: I was sent the ingredients for the purpose of testing out this recipe.
Not only that, but they've launched a great new Facebook app so you don't even need to leave your social media page to get your recipe inspiration.
I chose and tested one of their recipes as part of their celebratory competition (click on the badge at the bottom of the page to find out more about the competition). The one I picked was this mouth-watering Chocolate Tia Maria Fridge Cake. Even I can't mess up a no-bake cake right?

To be perfectly honest, I'd have been happy as Larry to have just sat there with a big spoon, ladling the molten chocolate gloop into my mouth - it smelt fabulous!
But, in the spirit of testing out the recipe, I followed it through and popped it into the fridge.
The recipe was simple and straight-forward to follow. I was expecting something akin to a solid Rocky Road type cake, but the addition of cream and Total yoghurt gave it more of a mousse consistency, with big chuncky bites of biscuit and fruit and nut.

I have to say, this was quite an expensive dessert (the addition of alcohol in particular bumping the price up), so probably one saved for a special occasion. If I make it again, I wouldn't use a bag of mixed fruit and nuts, but mix my own. The packet had far too many nasty plain peanuts in - the sort that should only be used in a net and hung out for the birds. With good quality brazil, hazelnuts and maybe macadamia nuts, the recipe would be much improved.
I was a little confused at the image which showed a square piece of fridge cake, and the instructions said to use a round cake tin, so I made mine in a tray.
Finally, the recipe suggests it serves 10. Even for a full-on chocolate lover like me, it was incredibly rich. I reckon you could cut much smaller servings and maybe serve 20 portions from this amount of ingredients.
I took mine along to a party, and whilst it was indeed delicious, I was really nervous - this bad boy contains pretty much every allergen you can imagine, so not great for serving to strangers. I felt like I was fending the small children and pregnant ladies away from the alcohol, and hovering over it to make sure it wasn't being consumed by anyone with a nut/dairy/gluten allergy!
Subscribe to:
Posts (Atom)