Wednesday, 13 March 2013
Folk music for little folk - Megson
I see it as a pretty important role as a parent to open our children's eyes and ears to different cultural experiences, whether it be art; music; theatre or film. I guess it's inevitable that Ruby will eventually find her own style, influenced by peers; friends and TV, but for now I want to expose her to as much variety as possible.
Ever since Bill Haley, Elvis Presley and the invention of Rock and Roll, it's been the natural order of things that parents hate their children's choice in music, but I'm hoping to keep her away from the over-synthesized, electronic, adult lyric based music that's in our charts now for as long as possible.
The new album by husband and wife folk duo Megson is a great new addition to our music collection. A CD rammed full of children's songs, you can be sure there'll be no inappropriate words (no cringe-worthy episodes of "hey sexy lady" shouted at the bus stop. No Gangnam Style grinding in the school playground) and the music comes from REAL instruments- accordion guitar; fiddle; and banjo to name a few. I genuinely worry that the 'yoof of today' are in danger of not being able to recognise what a string instrument looks like, let alone sounds like.
When I was a lad is a delightful mix of traditional nursery songs - like 5 little ducks and a frog he would a woo-ing go - together with some traditional songs, mainly from the north of England, and some of their own composition.
A lot of the songs struck a distant chord with me, and I suspect they are songs my Nana used to sing to me as a young baby. Ditties like Dance to your Daddy and Oats and Beans and Barley-O, and I found that I seemed to subconsciously know the words already.
If we don't expose our little ones to this kind of music, what will they sing to their children? Can you imagine them rocking their sons and daughters to sleep humming Olly Murs or Jessie J? Will the traditional folk tunes and old Music Hall songs be forgotten forever?
Ruby's favourite from the whole album (which we've played many times) is one of Megson's own entitled All the shops have fallen down. She loves it because it has "funny words"- I guess you can't expect a 5 year old to pick up on the nuances it makes about the decline of the British High Street and the breakdown of local communities... Have a sneaky listen to this sound cloud.
We thought the album was beautiful. Melodic, harmonic and innocent. A real simple pleasure in our complicated world.
It's available to purchase from their website at £10 and they are also touring over the next few months, so we hope to catch them in Cambridge.
Disclosure: We were sent a CD for the purposes of this review however all opinions and views expressed are my own.
Monday, 11 March 2013
Magpie Monday - Laundry Lovelies
Ambassador, with all these jumblies you are really spoiling us. Two in two weeks!
This latest one was for Ruby's school so I felt quite justified in going and taking the whole family along - you can't beat a family day out huh?
I snaffled lots of clothes and fabric for upcycling, a lovely pink wool jumper which I've already felted and hope to turn into a little handbag for Ruby - watch this space.
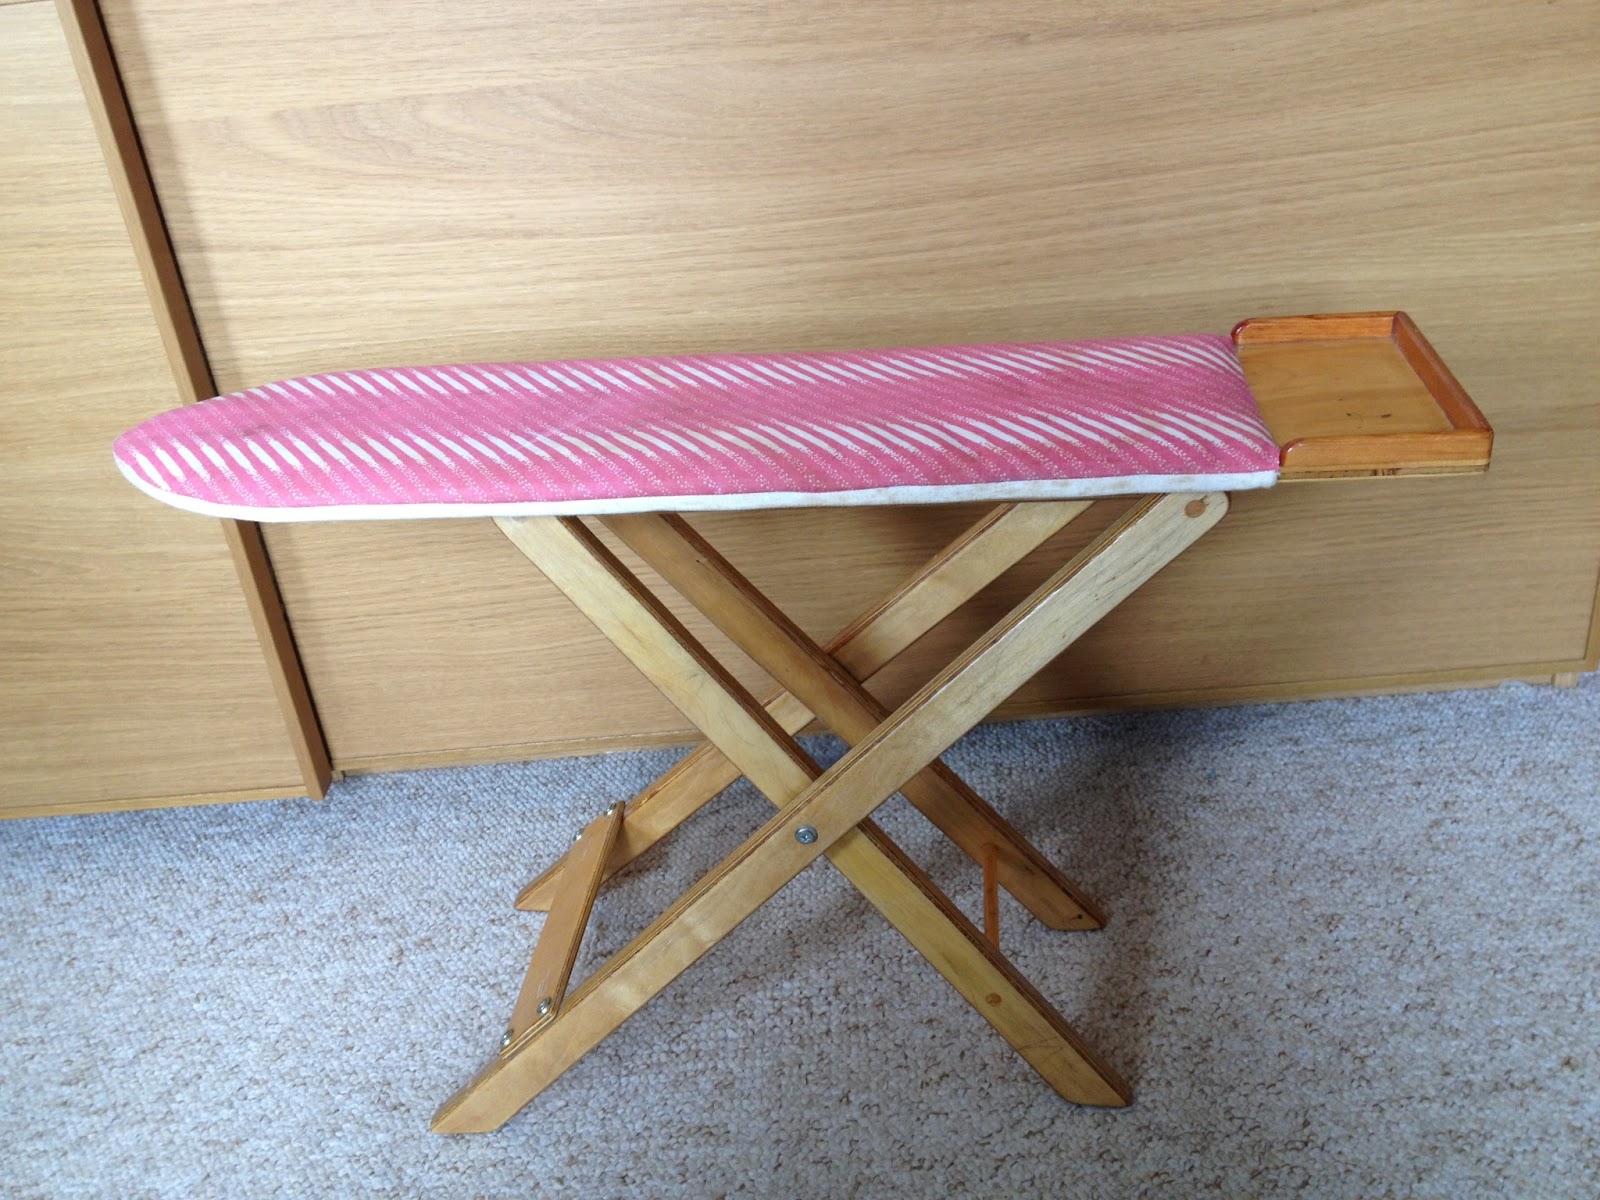
I was pleased to get this cute little child's ironing board, especially as one of her friend's mums had donated it. She told me her mum had previously bought it from a garage sale and her older daughter had had lots of play from it.
I plan to paint it and recover in some Cath Kidston fabric, and generally make it look a bit more lovely.
I also bought this pine towel rail for £2. That too will get the shabby chic treatment - I'm still in the 'if it don't move, paint it' mind set.
I'm thinking it will make a useful display too for craft fairs. When I get my backside in gear and attend another one.
What second-hand gems have you found lately? Grab the badge and link up.

This latest one was for Ruby's school so I felt quite justified in going and taking the whole family along - you can't beat a family day out huh?
I snaffled lots of clothes and fabric for upcycling, a lovely pink wool jumper which I've already felted and hope to turn into a little handbag for Ruby - watch this space.
I was pleased to get this cute little child's ironing board, especially as one of her friend's mums had donated it. She told me her mum had previously bought it from a garage sale and her older daughter had had lots of play from it.
I plan to paint it and recover in some Cath Kidston fabric, and generally make it look a bit more lovely.
I also bought this pine towel rail for £2. That too will get the shabby chic treatment - I'm still in the 'if it don't move, paint it' mind set.
I'm thinking it will make a useful display too for craft fairs. When I get my backside in gear and attend another one.
What second-hand gems have you found lately? Grab the badge and link up.
Thursday, 7 March 2013
Liss Ard Estate - A Warm Irish Welcome
| Photo credit Liss Ard Estate |
A little while back I had the pleasure of staying at Liss Ard with my family. The warmth and friendly nature of the Irish is legendary, and it they didn't fail to deliver.
The Liss Ard Estate, set in the stunning and tranquil countryside of West Cork, envelopes you in it's relaxed and welcoming atmosphere as soon as you arrive.
The stunning 19th century mansion house and secluded lake lodge manage to balance both luxury and homeliness, and it's no surprise that celebrities and rock stars have sought refuge here. The grand piano in the entrance hall has been played by the likes of Lou Reed and Van Morrison and the walls of the lake lodge are adorned with photos of their famous guests.
![]() |
| Photo credit Liss Ard Estate |
Here, you are allowed to just be. There's time and space to do whatever you want. The hotel staff have mastered the very clever skill of being around, without you even noticing them. Nobody minds if you want to pad around the great house in your socks, if the kids want to run shouting and whooping through the woodland grounds or climb the trees. In fact, so vast are the estate grounds that if your visit is out of season when the grounds are shut to the public, you can wander around for hours without seeing another soul.
On a couple of mornings, we crept down the grand staircase at 6am. The house was silent and the shutters still closed. Walking across the garden by the haw-haw, the sheep graze on undisturbed and we'd descend the moss-covered stone steps onto the woodland pathway. Passing the waterfall garden, breathing in the rare air, the birds would be chorusing in the ancient lichen covered trees. Down the winding secret paths until Abisdealy, the vast private lake revealed itself. Myself and Ruby would paddle in the water's edge and watch the birds flitting through the reeds, while the Other Half bravely stripped down to trunks and dived in, soaking up the peace and freedom.
A quick dry off, then back to our room for a warming shower before joining the handful of other guests for breakfast. There is something about the air here that makes you feel invigorated, exhausted and ravenously hungry all at the same time. Thankfully the traditional Irish breakfast seems to be a panacea for us all. Tucking into the locally sourced sausages, Clonakilty black pudding and fresh farm eggs, we still couldn't help but eye up the breakfast buffet table too. The aroma of freshly baked bread and pastries, together with a huge bowl of fresh fruit salad makes for a real country, farmhouse atmosphere. Until that is, you notice your surroundings and remember that this is far from a farmhouse.
![]() |
| Photo credit Liss Ard Estate |
After breakfast Ruby was always keen to join the kid's club which runs every morning. We really appreciated the skilled and experienced staff who ensured it wasn't just a babysitting service, but an action-packed and fun-filled few hours. In the few days we stayed, Ruby enjoyed baking; face painting; crafting and outdoor games, as well as a movie morning in the well equipped lower ground playroom.
While she was busy, we were able to kick back on the luxurious sofas in the drawing room, soak up the open fire and relax with the morning's papers. One day I even managed to slip off for a massage.
There's plenty to do and see in the surrounding area and the staff are more than happy to share their local knowledge, whether it's telling you the best place to get a crab sandwich and a pint of the black stuff; the best scenic drives; a secluded local beach or directions to a very well hidden farm to visit.
Lough Hyne is well worth the short drive, not just because it's another wild swimming opportunity but because quite simply it's one of the most beautiful places I've ever seen.
Equally, there's loads to do on site, from their own GPS trail to boat rides on the lake. There is a well equipped games room with toys, books and Wii console for days when it rains, otherwise, borrow a bike or the all-terrain buggy, slip on one of the communal pairs of wellies and a Barbour jacket, grab a picnic blanket and go off and explore the 200 acres.
One of the biggest surprises in such a secluded area, is a world renowned living art installation. The Sky Garden by James Turrell, is a monumental sight and experience. Take the cleansing and enlightening journey through the tunnel so silent it's deafening. Let your senses adjust to the light before rising up the staircase through the white light opening in the sky. There you are greeted by a gigantic crater which holds you safe. The only view is the steeply sloping grass sides or the sky above. At night time, lay back on the stone plinth and enjoy the purest uninterrupted view of the night sky you're likely to see. It's an incredible experience, and one which will stay with me.
********************************************
We stayed in the O'Donovan Suite in the main house. Rooms for family groups are also available in the Garden Mews and the Lake Lodge.
![]() |
| Photo credit Liss Ard Estate |
For further information and bookings, visit the Liss Ard Estate website.
Sponsored post. All views and opinions are my own.
Thank your Mum for the everyday things with P&G - Mother's Day giveaway
P&G believe it's the little, everyday things that mums do for their children which makes them special. Small gestures or activities which enrich their lives, from teaching them to tie their laces, to getting them ready to go to big school. From washing their hair, to cleaning favourite teddies.
They believe that the “ordinary” things mums do every day have an amazing impact for the whole family, which is why their mission is to make products that help towards making everyday life that little bit better. They are calling this the 'Everyday Effect'.
So, to wish you a happy Mother’s Day we're giving you the chance to win a hamper full of P&G goodies so that you can enjoy a bit of the Everyday Effect too!
Take a look at the video above, and them I'd like you to tell me in the comments below, what one little thing you remember your mum (or guardian) doing for you. What would you like to thank them for?
For an additional entry you can tweet "I'm entering to win an #everydayeffect hamper of treats with @missielizzieb and @PGUK here: http://bit.ly/WwiY2w" Leave a comment to say you have done so.
One winner will be chosen at random and receive the following:
Pantene Repair & Protect Normal – Thick Hair 500ml Shampoo
Pantene 2min Deep Repair Masque 200ml Normal – Thick Hair
Max Factor Clump Defy Mascara
Olay Regenerist Night Recover Cream 50ml
Olay Regenerist Daily Regenerating Serum 50ml
The closing date is Monday 11th March 2013 at 12:00 midday. Open to UK entrants only. Please remember to leave a method of contact with your entry.
Disclosure: Prize supplied and fulfilled by Procter &Gamble. I was also supplied with a hamper.
Wednesday, 6 March 2013
Designing a room from scratch
I'm taking my head out of the sand, just long enough to write this post and plea for help.
When we bought our current house, we'd always agreed that we would convert the garage into living space. With a loft conversion, and an extension of a side garage with bedrooms over, the house always felt 'top heavy'. Plus we've never used the garage to keep the car in anyway.
The plan was to knock through the existing dining room into the garage and create a huge open-plan 'L-shaped' family room, thus leaving the front room as a 'grown up sitting room,'so I can sit like a Victorian ma'am in my front parlour, sipping tea and doing a spot of embroidery so we can sit on the sofa without negotiating mounds of toys, and watch a TV free from smeary, chocolatey hand prints of an evening.
That was 18 months ago.
We've got as far as submitting planning permission. It's all been approved and signed off. We've got architects drawings.
But that's where it stops. The next stage is to draw up some more detailed plans so we can get a scope of works written, and tender for builders.
Who knew there was so much minutia to consider? I was hoping I might just have to pick out a new sofa and soft furnishings. Maybe a few cushions.
After spending a full 10 hours last Friday making a Roman blind with a friend, whilst I was pleased with the outcome, I think for the 4 windows we'll be having I'll be looking to a Blinds Supermarket. I can't bear the thought of so much sewing.
But even there, there's options and choices. I mean, do we go for pleated blinds, roller blinds, wooden slatted ones...?
And there's the windows themselves. Do we have two windows at the back to mirror the upstairs, or do we have doors onto the patio? French doors or sliding? Or bi-fold?? Arrggghhh.
We haven't even started on the flooring options. Or heating - radiators or underfloor heating? A fire or not? Where will the lights go, and the plug sockets? Where are we putting the TV? Should we have a built in system?
Seriously, I need help. Have any of you planned an extension before? Where do I start? Do I need mood boards and suppliers names? I'm guessing a vague idea in my head won't cut it here?
I think I might have a go with one of those online 3D planners. Have you tried them or got any you'd recommend?
I can't believe I actually thought this project would be exciting. I am overwhelmed by it all before it's even started.
Disclosure: Sponsored post.
When we bought our current house, we'd always agreed that we would convert the garage into living space. With a loft conversion, and an extension of a side garage with bedrooms over, the house always felt 'top heavy'. Plus we've never used the garage to keep the car in anyway.
The plan was to knock through the existing dining room into the garage and create a huge open-plan 'L-shaped' family room, thus leaving the front room as a 'grown up sitting room,'
That was 18 months ago.
We've got as far as submitting planning permission. It's all been approved and signed off. We've got architects drawings.
But that's where it stops. The next stage is to draw up some more detailed plans so we can get a scope of works written, and tender for builders.
Who knew there was so much minutia to consider? I was hoping I might just have to pick out a new sofa and soft furnishings. Maybe a few cushions.
After spending a full 10 hours last Friday making a Roman blind with a friend, whilst I was pleased with the outcome, I think for the 4 windows we'll be having I'll be looking to a Blinds Supermarket. I can't bear the thought of so much sewing.
But even there, there's options and choices. I mean, do we go for pleated blinds, roller blinds, wooden slatted ones...?
And there's the windows themselves. Do we have two windows at the back to mirror the upstairs, or do we have doors onto the patio? French doors or sliding? Or bi-fold?? Arrggghhh.
We haven't even started on the flooring options. Or heating - radiators or underfloor heating? A fire or not? Where will the lights go, and the plug sockets? Where are we putting the TV? Should we have a built in system?
Seriously, I need help. Have any of you planned an extension before? Where do I start? Do I need mood boards and suppliers names? I'm guessing a vague idea in my head won't cut it here?
I think I might have a go with one of those online 3D planners. Have you tried them or got any you'd recommend?
I can't believe I actually thought this project would be exciting. I am overwhelmed by it all before it's even started.
Disclosure: Sponsored post.
Monday, 4 March 2013
Magpie Monday - Jumble Sale Spoils
I wrote a few weeks back, my top tips for jumbles. I LOVE jumble sales, for so many reasons, but mainly because it's one of the few places left in 2013 that you can still buy something for 10 or 20p.
So many of you commented that you don't have any in your area, but I'm sure they are there if you hunt them out. They are mainly the domain of village halls, so you may need to leave the towns, but keep an eye out in the local paper, or search online classified sites in your local area such as Friday Ads, Vivastreet or Gumtree. In fact, just a good old Google search with the term 'Jumble Sale *your town/county*' should come up with something,
Just to spur you on, here's what I managed to find this weekend. The clothing items were 30p each or 4 for £1, and the bric-a-brac was mostly 20p.
A pretty vintage brooch with coloured rhinestones, a boxed set of feather butterfly decorations for Ruby's room and a brand new set of Topshop glitter eyeshadows, original price £18. The disco make-up was quicky and happily recived by my mate who came with me.
It was a bumper haul for Ruby. She also got this Hello Kitty sticker station craft kit (£1), a pair of pristine Hello Kitty mittens (a perfect fit) and a brand new looking set of bike/scooter protective pads - somewhat after the horse has bolted as she managed a bloody nose and a day off school last week through coming off her scooter.
A pretty china lidded ginger jar, a big beaded necklace (crafty plans already afoot), a lovely pink woollen poncho for Ruby and my best find, a pair of pink Converse baseball boots (hardly worn) for £2,
Some cute furry boot cuffs, a pestle and mortar, a vintage frame (for another craft project), a Laura Ashley linen teddy and a Zara brown cord mini skirt.
A vintage black C&A poncho (either for myself or ebay), a pretty ditsy top which I brought for the fabric and only when I got it home did I see it's Ruby's size, so she can have some wear from it before I hack it up, and a Next TShirt for me.
I was so pleased with this haul, and this isn't even all of it. I also got a huge enamel steamer pot, some kilner jars and a sugar shaker.
So go on, hunt out a jumblie near you.
Grab the badge and link up your second-hand finds. Lets save all this stuff from landfill, and love it again.

So many of you commented that you don't have any in your area, but I'm sure they are there if you hunt them out. They are mainly the domain of village halls, so you may need to leave the towns, but keep an eye out in the local paper, or search online classified sites in your local area such as Friday Ads, Vivastreet or Gumtree. In fact, just a good old Google search with the term 'Jumble Sale *your town/county*' should come up with something,
Just to spur you on, here's what I managed to find this weekend. The clothing items were 30p each or 4 for £1, and the bric-a-brac was mostly 20p.
A pretty vintage brooch with coloured rhinestones, a boxed set of feather butterfly decorations for Ruby's room and a brand new set of Topshop glitter eyeshadows, original price £18. The disco make-up was quicky and happily recived by my mate who came with me.
It was a bumper haul for Ruby. She also got this Hello Kitty sticker station craft kit (£1), a pair of pristine Hello Kitty mittens (a perfect fit) and a brand new looking set of bike/scooter protective pads - somewhat after the horse has bolted as she managed a bloody nose and a day off school last week through coming off her scooter.
A pretty china lidded ginger jar, a big beaded necklace (crafty plans already afoot), a lovely pink woollen poncho for Ruby and my best find, a pair of pink Converse baseball boots (hardly worn) for £2,
Some cute furry boot cuffs, a pestle and mortar, a vintage frame (for another craft project), a Laura Ashley linen teddy and a Zara brown cord mini skirt.
A vintage black C&A poncho (either for myself or ebay), a pretty ditsy top which I brought for the fabric and only when I got it home did I see it's Ruby's size, so she can have some wear from it before I hack it up, and a Next TShirt for me.
I was so pleased with this haul, and this isn't even all of it. I also got a huge enamel steamer pot, some kilner jars and a sugar shaker.
So go on, hunt out a jumblie near you.
Grab the badge and link up your second-hand finds. Lets save all this stuff from landfill, and love it again.
Saturday, 2 March 2013
Little Red Riding Hood Cape Tutorial
World Book Day is coming - whoooo-hooo!
That means one thing - the chance to dress up and play out our favourite stories. We've recently been spending lots of time in the woods in our role as Forestry Commission Bloggers, and coincidentally, their theme this year is 'Fairy Tales', so you see, it all fits in perfectly because our favourite story is Little Red Riding Hood.
We have lots of copies and different versions at home, from the traditional Brothers Grimm version (too nightmare-inducing at the moment) to modern, more amusing versions.
It's a story we often re-tell when walking in the forest. Our dog becomes the big bad wolf, and of course I get lumbered with playing Grandma. But now I've made a cape to add to the mix, I know we're going to have even more fun.
I kept the cape simple to make - I'm no seamstress! There's no pattern, I just did it by eye, measuring it up against my daughter as I went.
You will need:
Begin by laying both fabrics together, back to back so the good sides are facing outwards. Pin together to keep in place. If you are not lining your cape, skip this part.
Fold the fabric in half (along the long length). Then, cutting through all 4 layers together (or just the 2 layers if you're not lining) cut a nice curved shape off one of the corners. This will mean when the cape hangs from the shoulders, you wont have ugly square corners.
Open out the fabric and turn over the edges twice, rolling in the edge of the lining and secure with pins. Hand stitch all the way around.
Next, place the cape over the child's head (the long straight edge is your top, the curved shorter edge, the bottom). Gather by hand around the shoulders, and shape into place to make the hood. Carefully mark the points where the two edges meet under the chin and at the back of the neck. Mark with tailors chalk and then lift off over the head.
Your fabric will then naturally be folded in half, with the points marked like so:
Open your fabric out flat, and on the inside mark a sweeping curved line joining the points up. This will be the base of the hood.
Take some double thickness cotton, tie a secure knot in one end then stitch a wide running stitch all the way along that curved line.
Now hold on to both ends of the thread and pull to gather. Arrange the gathers and folds as you like, checking for fit as you go. Now it's beginning to look like a cape.
Open out flat again, careful to keep it gathered as you want, and lay your ribbon over the lining where your running stitch is. Be sure you have even lengths left for the tie at the ends. Pin into place holding the gathers in situ.
Machine zigzag the ribbon in place, securing the gathers. Remove pins and you're done! For younger children, if you are not comfortable with a ribbon tie round the neck for safety reasons, cut the ribbon back close to the cape edge and stitch some velcro or press studs on instead.
Now you're ready for skipping through the forest.
That means one thing - the chance to dress up and play out our favourite stories. We've recently been spending lots of time in the woods in our role as Forestry Commission Bloggers, and coincidentally, their theme this year is 'Fairy Tales', so you see, it all fits in perfectly because our favourite story is Little Red Riding Hood.
We have lots of copies and different versions at home, from the traditional Brothers Grimm version (too nightmare-inducing at the moment) to modern, more amusing versions.
It's a story we often re-tell when walking in the forest. Our dog becomes the big bad wolf, and of course I get lumbered with playing Grandma. But now I've made a cape to add to the mix, I know we're going to have even more fun.
I kept the cape simple to make - I'm no seamstress! There's no pattern, I just did it by eye, measuring it up against my daughter as I went.
You will need:
- 75-100cm of red fabric (depending on the length of cape you want, my daughter is 5yrs and we used 75cm). This fabric is 150cm wide. Velvet; fleece or faux fur is ideal. Check out markets and Asian stores for good value fabrics.
- same amount of poly-satin for the lining - if your fabric is non-fray and has a nice reverse, you can skip this step
- Matching red cotton
- 150 cm of red satin or velvet ribbon
Begin by laying both fabrics together, back to back so the good sides are facing outwards. Pin together to keep in place. If you are not lining your cape, skip this part.
Fold the fabric in half (along the long length). Then, cutting through all 4 layers together (or just the 2 layers if you're not lining) cut a nice curved shape off one of the corners. This will mean when the cape hangs from the shoulders, you wont have ugly square corners.
Open out the fabric and turn over the edges twice, rolling in the edge of the lining and secure with pins. Hand stitch all the way around.
Next, place the cape over the child's head (the long straight edge is your top, the curved shorter edge, the bottom). Gather by hand around the shoulders, and shape into place to make the hood. Carefully mark the points where the two edges meet under the chin and at the back of the neck. Mark with tailors chalk and then lift off over the head.
Your fabric will then naturally be folded in half, with the points marked like so:
Open your fabric out flat, and on the inside mark a sweeping curved line joining the points up. This will be the base of the hood.
Take some double thickness cotton, tie a secure knot in one end then stitch a wide running stitch all the way along that curved line.
Now hold on to both ends of the thread and pull to gather. Arrange the gathers and folds as you like, checking for fit as you go. Now it's beginning to look like a cape.
Open out flat again, careful to keep it gathered as you want, and lay your ribbon over the lining where your running stitch is. Be sure you have even lengths left for the tie at the ends. Pin into place holding the gathers in situ.
Machine zigzag the ribbon in place, securing the gathers. Remove pins and you're done! For younger children, if you are not comfortable with a ribbon tie round the neck for safety reasons, cut the ribbon back close to the cape edge and stitch some velcro or press studs on instead.
Now you're ready for skipping through the forest.
What's your favourite character for World Book Day? Do you love traditional fairy stories, or do you prefer more contemporary books?
Subscribe to:
Posts (Atom)